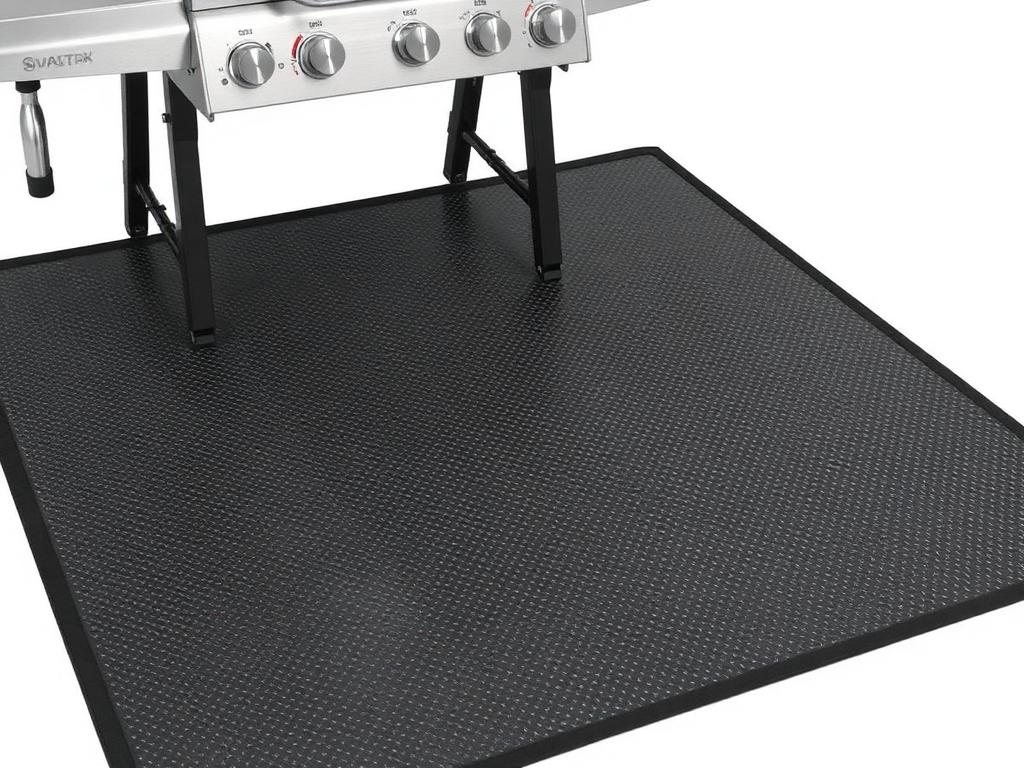
 TOP PICK
Disposable Grease Tray Liners
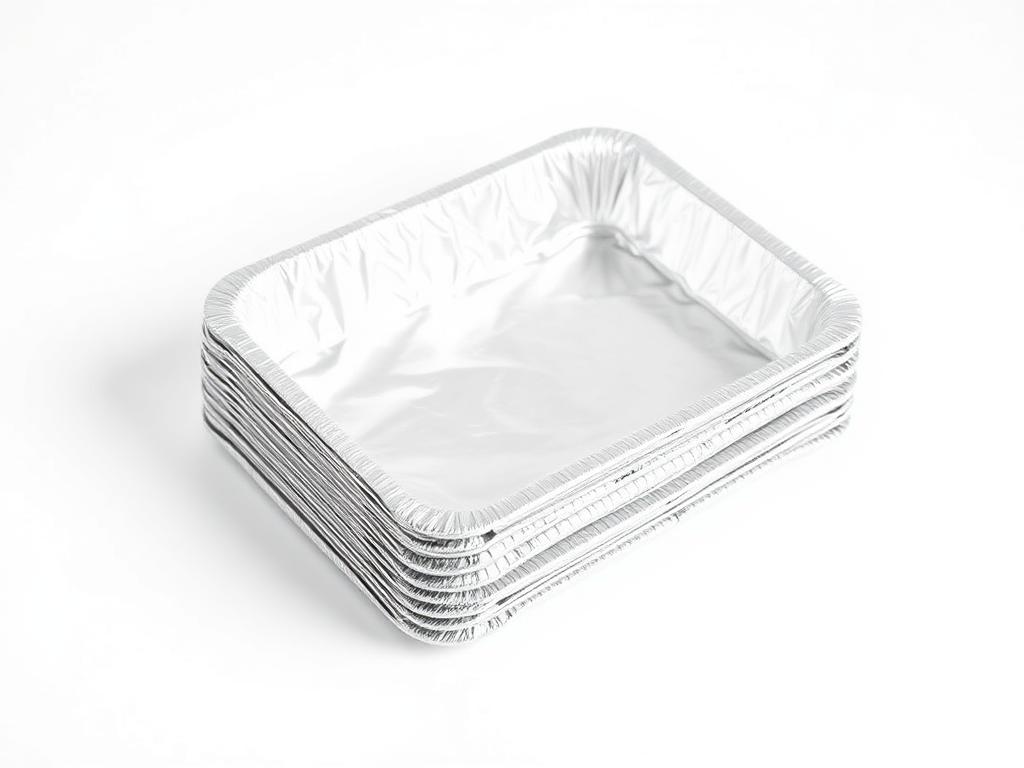
Aluminum foil liners that snap into the grease tray. The single best ROI grill accessory. Replace every 3-4 cooks instead of scrubbing.
Check current price
Check Price on AmazonLive Guide · Grill Maintenance
A grill's grease trap (also called grease tray, drip pan, or grease cup) is the single biggest source of flare-ups, smoke, mold, and grill fires. Most owners ignore it for years — until smoke pours from the bottom, a fire starts, or their Traeger displays "Clean Grease Trap." This guide covers the 6 cleaning procedures you'll actually need: routine grease trap empty/clean, deep clean for caked-on grease, full grill grease cleanup, post-grease-fire restoration, brand-specific grease trap locations (Weber, Traeger, Char-Broil, Blackstone, Nexgrill, Ninja Foodi), and how to remove grease stains from concrete or wood deck.
Quick Answer · 60 seconds
To clean a grill grease trap: (1) let the grill cool completely, (2) slide the grease tray out from underneath, (3) empty solid debris and used grease into a sealed trash bag, (4) scrape with a plastic scraper or putty knife, (5) wash with hot soapy water and degreaser, (6) dry thoroughly, and (7) install a disposable foil liner before reusing. Empty after every 2-3 cooks; deep-clean every 5-10 cooks.
Traeger Alert · Fix It Now
Traeger grills running newer D2 controllers display a "Clean Grease Trap" reminder every 20-30 cooks. This is NOT an error — it's a scheduled maintenance prompt. The grill will still operate. But ignoring it eventually causes the HEr (high temp) error, grease fires, and warranty issues.
Press the SETTINGS or MENU button on your Traeger controller.
Navigate to "Reminders" or "Maintenance" — exact path varies by controller (Pro D2, Ironwood, Timberline).
The alert can be dismissed AFTER you've cleaned the trap — but don't dismiss it BEFORE cleaning, or you'll forget.
Follow the grease tray cleaning procedure below (Routine section of this guide).
What do you need to clean?
Different grease problems need different procedures. Pick yours to jump straight to the right steps.
Video Guide
A walkthrough of routine grease tray cleaning, deep-clean procedure, and the disposable liner trick that saves 80% of cleanup time — on a Weber Spirit E-310 with cross-references to Traeger Pro 780 and Blackstone griddle.
Video walkthrough coming soon
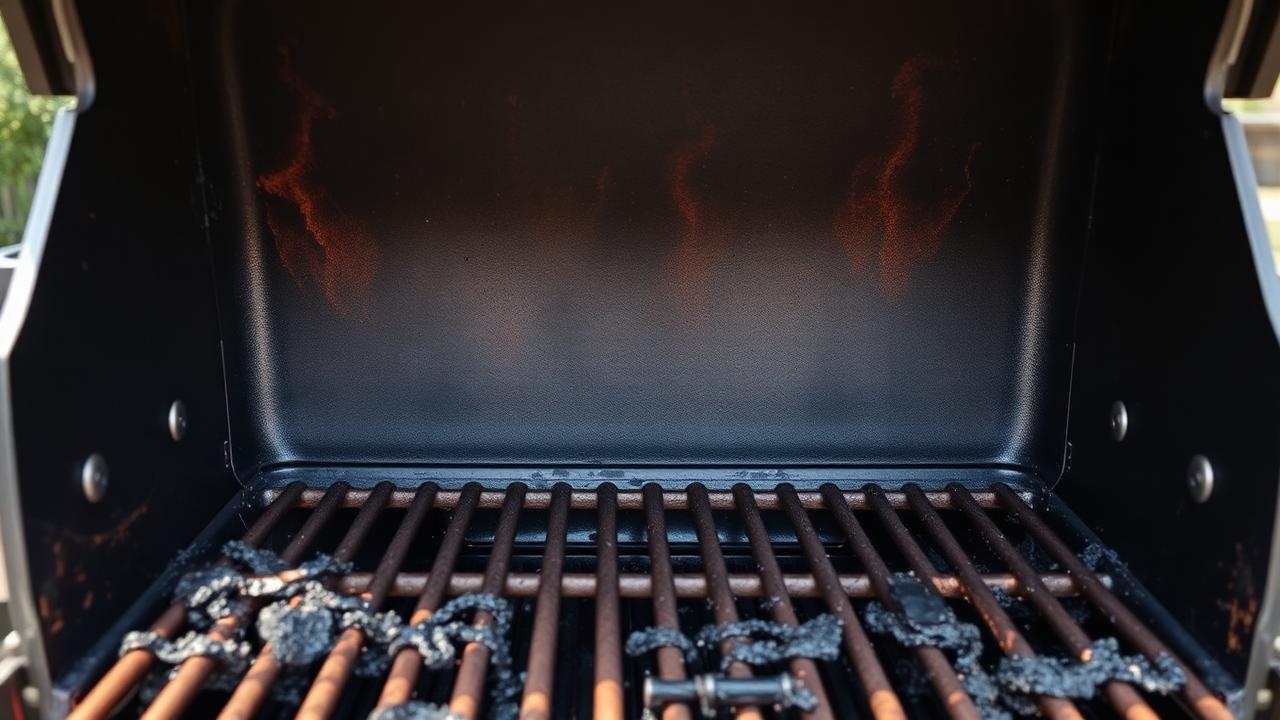
Routine · 10 min
Do this every 2-3 cooks. It takes 10 minutes total, prevents 90% of grease problems, and is the single most important grill maintenance task.
Let the grill cool fully — minimum 30 minutes after the last cook, ideally several hours.
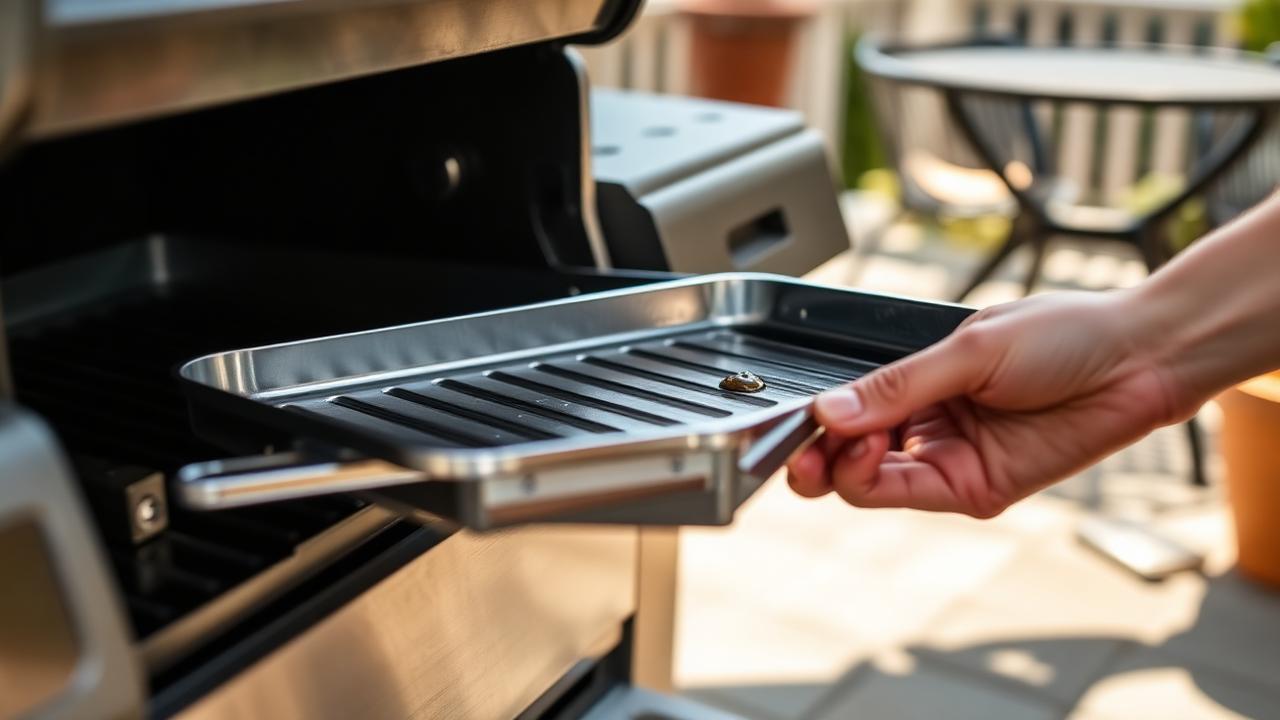
Locate the grease tray (see brand-specific section below if you can't find it).
Slide the grease tray out — most slide from front, side, or rear.
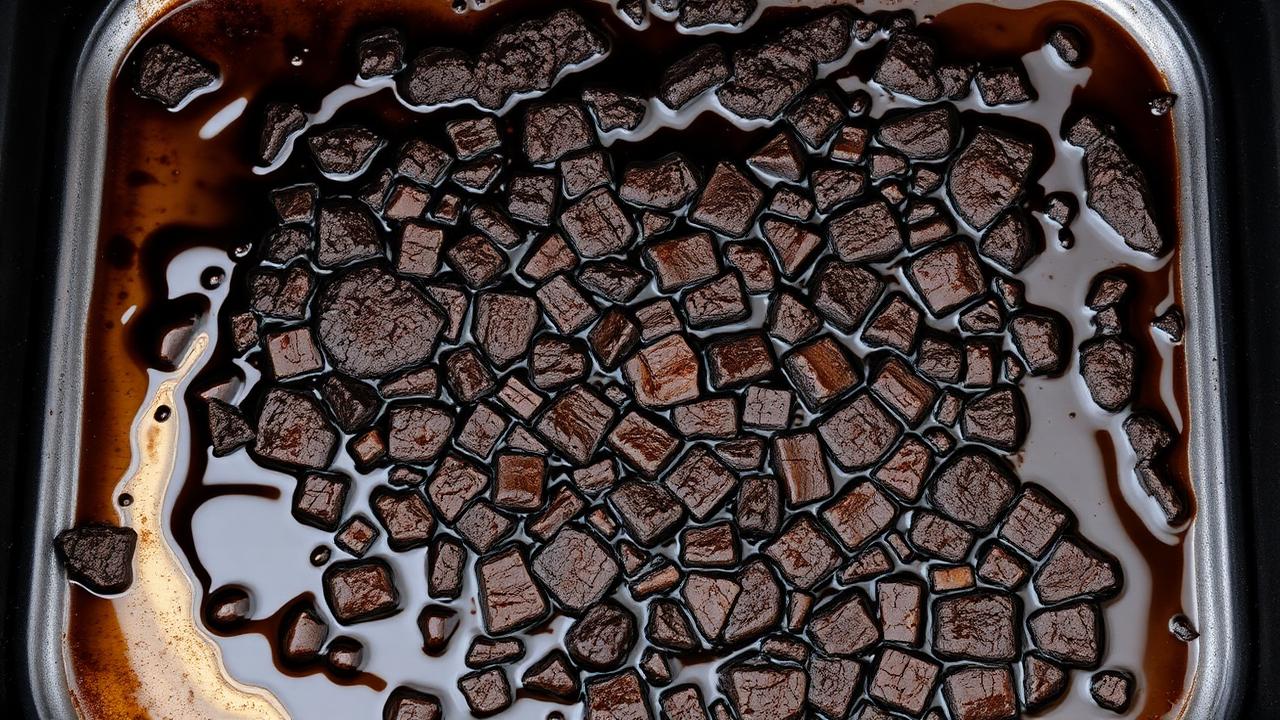
Empty solid debris and used grease into a SEALED trash bag (loose grease in trash bags leaks and attracts animals).
Scrape any caked grease with a plastic scraper or putty knife — don't use sharp metal that can damage the tray's coating.
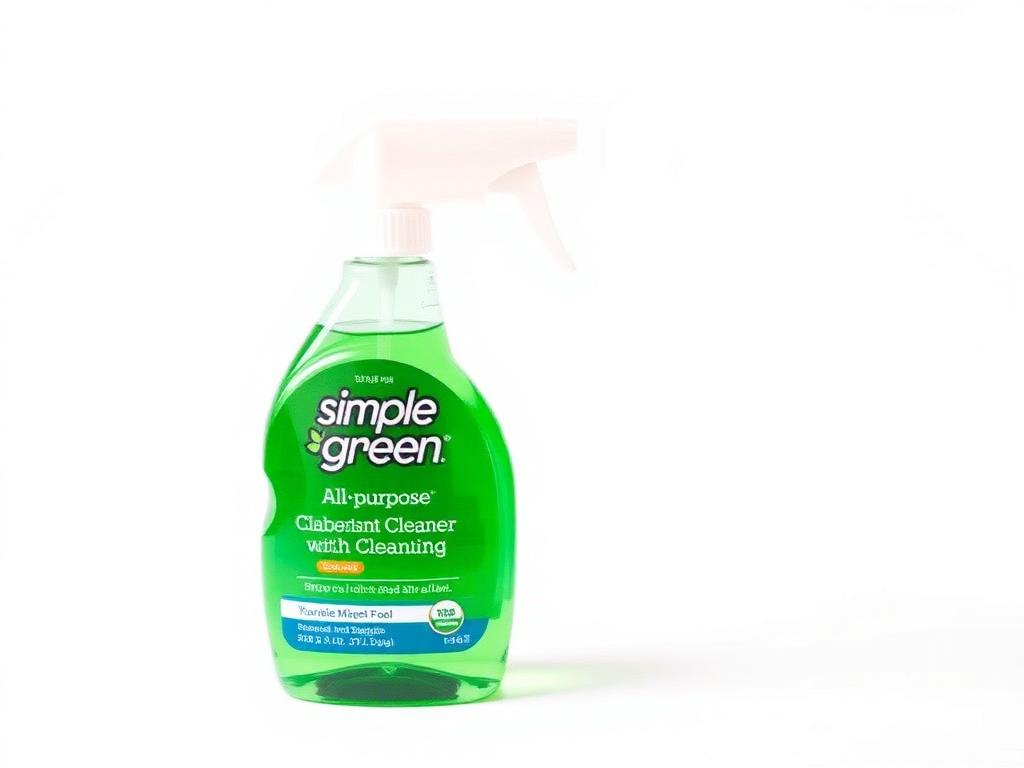
Wash the tray with hot soapy water and a degreaser like Simple Green, Dawn Power Wash, or a dedicated grill cleaner.
Rinse and dry thoroughly with a microfiber cloth — water residue accelerates rust on metal trays.
Optional but recommended: install a disposable aluminum foil grease tray liner before reinstalling. Replace the liner every 3-4 cooks; the tray underneath stays clean.
Deep Clean · 30 min
If routine cleaning has been skipped for months (or years), the grease tray will have hardened deposits that scraping alone won't remove. This procedure handles them.
Remove the grease tray as in routine cleaning.
Scrape off everything you can with a plastic scraper — get the loose chunks first.
Fill the tray with hot water and add 1 cup of dish soap + 2 tablespoons of baking soda.
Soak for 30-45 minutes — the alkalinity breaks down hardened grease.
Scrub with a stiff brush or scouring pad (steel wool on stainless trays only — never on porcelain or coated trays).
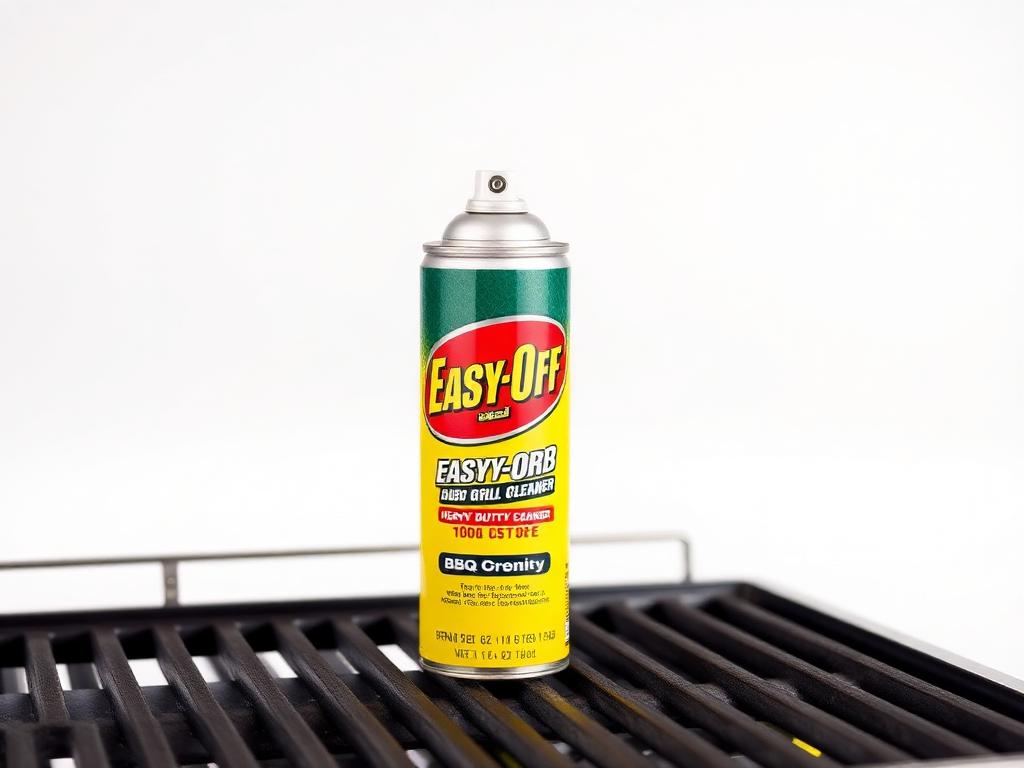
For grease that still won't come off: spray with degreaser (Easy-Off Heavy Duty BBQ Grill Cleaner, Goo Gone Grill & Grate Cleaner, or Zep) and let sit for 10 minutes before re-scrubbing.
Whole-Grill · 1 hour
When grease has overflowed past the tray or accumulated INSIDE the cookbox (the bottom of the grill housing), you need a more aggressive procedure. This is where you tackle the broader "how to clean grease from a grill" cluster.
Turn off and disconnect the propane tank (or shut off natural gas at the valve).
Let the grill cool completely.
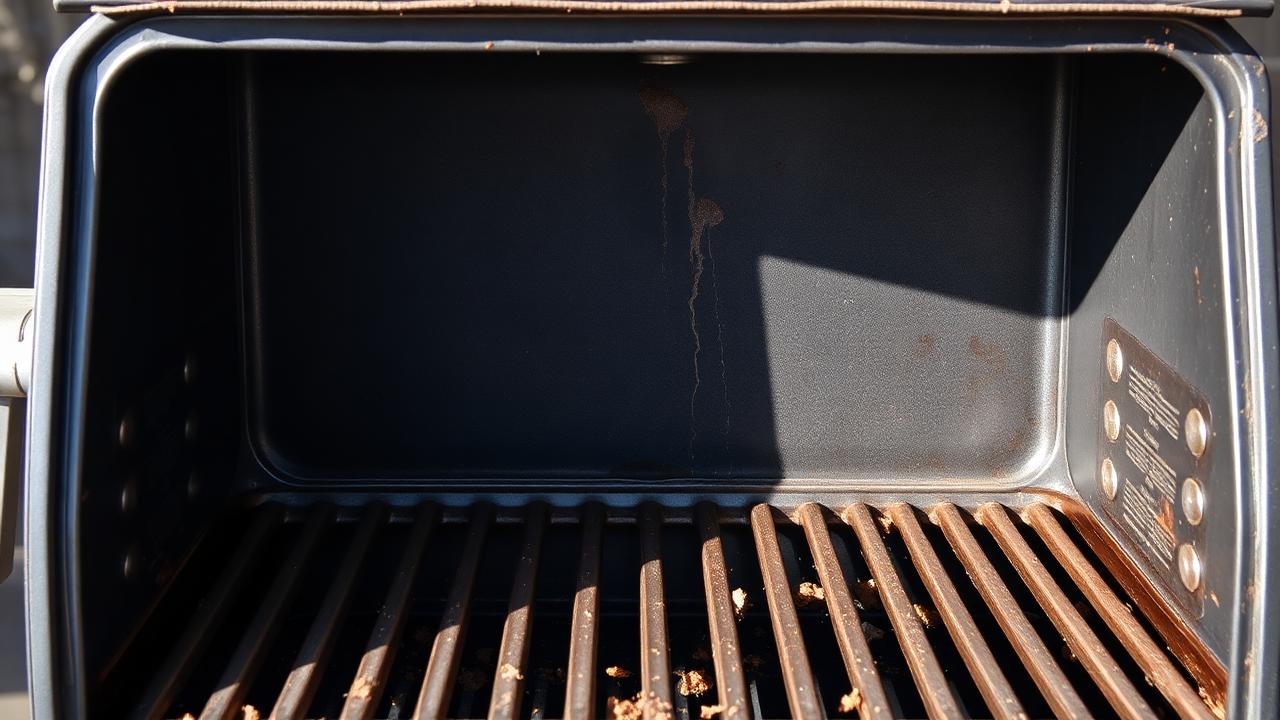
Remove cooking grates, flavorizer bars/heat plates, and burner tubes.
Scrape out solid grease and debris from the bottom of the cookbox with a putty knife.
Vacuum loose debris with a shop vac (NOT a household vacuum — grease and ash will destroy household vacs).
Spray cookbox interior with degreaser and let sit 10 minutes.
Scrub with stiff brush, rinse with a garden hose if outdoor — or wipe with hot soapy rags if you can't rinse.
Dry thoroughly, then reinstall components in reverse order. First cook on HIGH for 15 minutes burns off any cleaner residue.
Post-Fire · Recovery
A grease fire scorches, melts, and contaminates parts of the grill beyond what routine cleaning addresses. The procedure below restores the grill — but only if no structural damage occurred. If the fire warped the lid, melted control knobs, or damaged the regulator, repair-or-replace decisions come first.
Wait until the grill is COMPLETELY cool — minimum 2 hours after the fire was extinguished. Embers can hide in grease and reignite.
Inspect for structural damage: warped lid (won't close properly), melted control knobs, melted regulator hose, cracked porcelain on grates or flavorizer bars. Any of these need replacement before further use.
Remove ALL components — grates, flavorizer bars, burner tubes, heat plates. Dispose of any that are clearly damaged.
The cookbox interior will have heavy carbon deposits and melted grease. Scrape what you can, then spray with degreaser and let sit 20-30 minutes.
Wash all reusable components with hot soapy water + degreaser. Pay special attention to the underside of the lid — soot from the fire accumulates there.
Inspect the regulator hose for melted spots, cracks, or hardness. Replace immediately if damaged — see our regulator reset and replacement guide.
Surface-Specific
Stainless steel grill exteriors and cookboxes pick up grease over time — especially around the lid handle, control panel, and side shelves. Wrong cleaners scratch or discolor stainless permanently. Right cleaners restore the shine.
The rule: clean WITH the grain, not across it. Stainless steel has a directional brushed finish. Scrubbing perpendicular to the grain leaves permanent scratch marks.
Patio Cleanup
Spilled grease leaves dark stains on concrete that don't wash off with normal cleaners. The fix uses absorbent materials and degreasers — and it works on fresh stains. Old stains (months+) are much harder.
Find Your Grease Trap
Grease trap location varies wildly by brand and model. Here's where to look on every major grill brand.
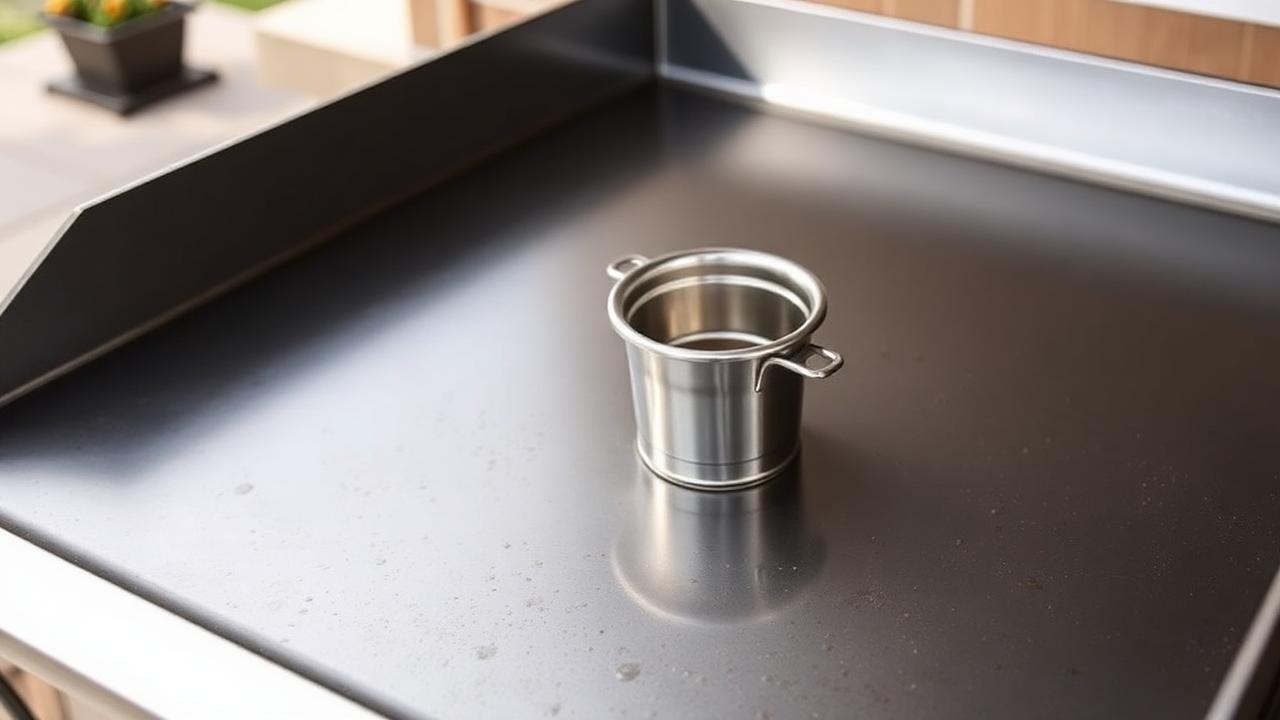
Pull from the rear bottom of the cabinet — a metal grease cup slides out on most Weber gas models. The catch pan is shaped to direct drippings into a removable cup. On older models, the entire bottom panel is the grease tray. See Weber replacement parts guide for grease cup replacements.
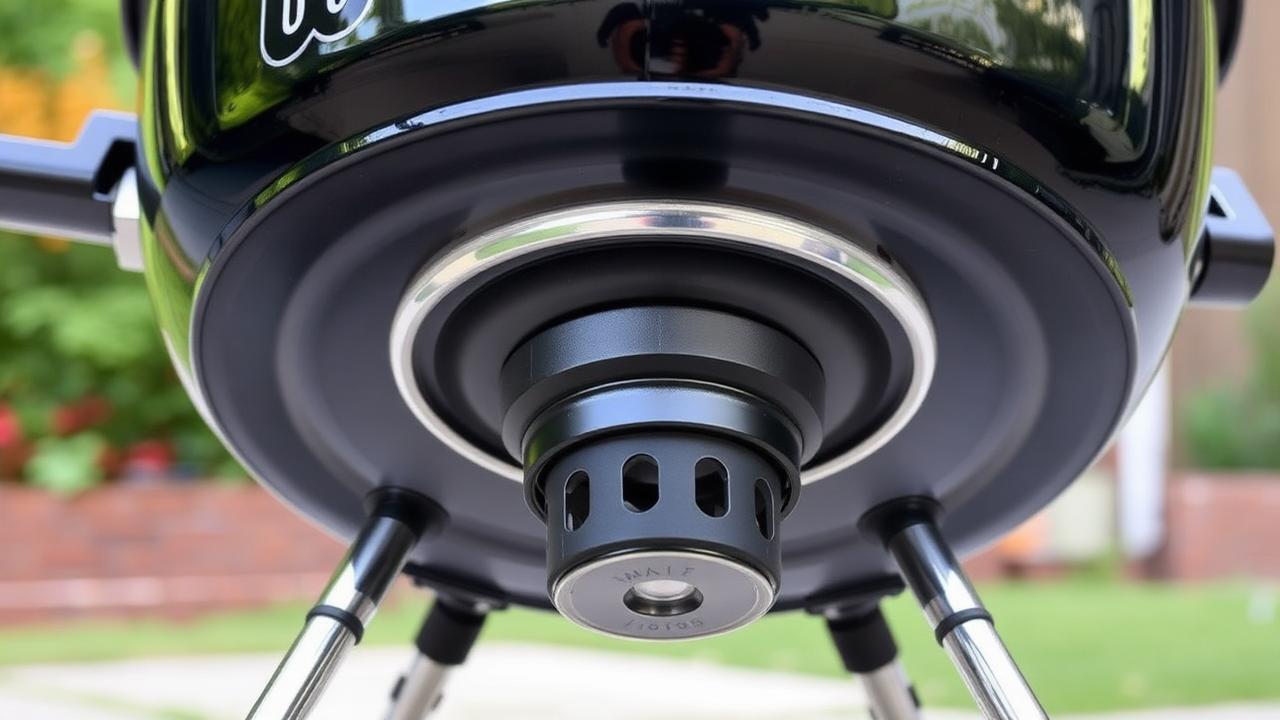
Charcoal kettles have an ash catcher (not a grease trap) under the bottom bowl. Modern One-Touch kettles have a hinged ash catcher that swings down. Clean every 2-3 cooks to maintain airflow — see our charcoal won't stay lit guide on why this matters.
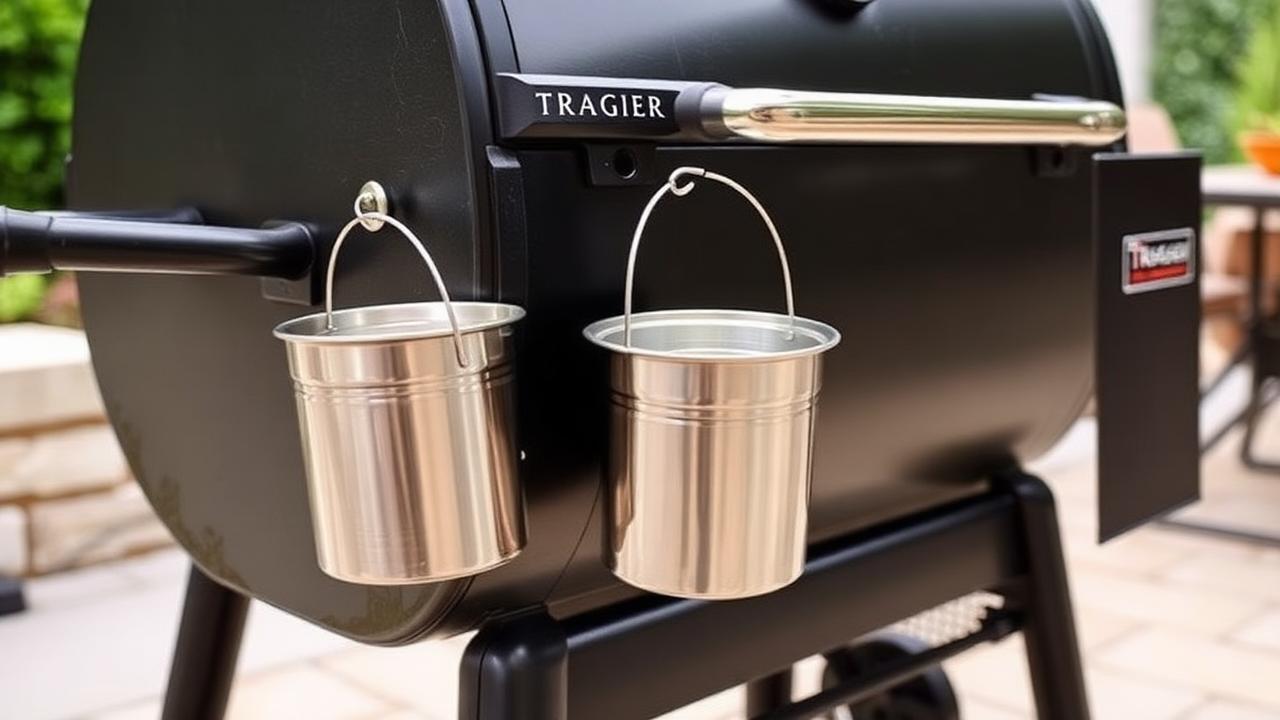
Traegers have TWO grease management points: (1) a slanted drip tray INSIDE the grill that funnels grease to a side chute, and (2) a hanging grease bucket on the SIDE of the grill where collected grease drips into. Empty the bucket every 5-10 cooks. Replace the drip tray foil liner monthly. See Traeger replacement parts.
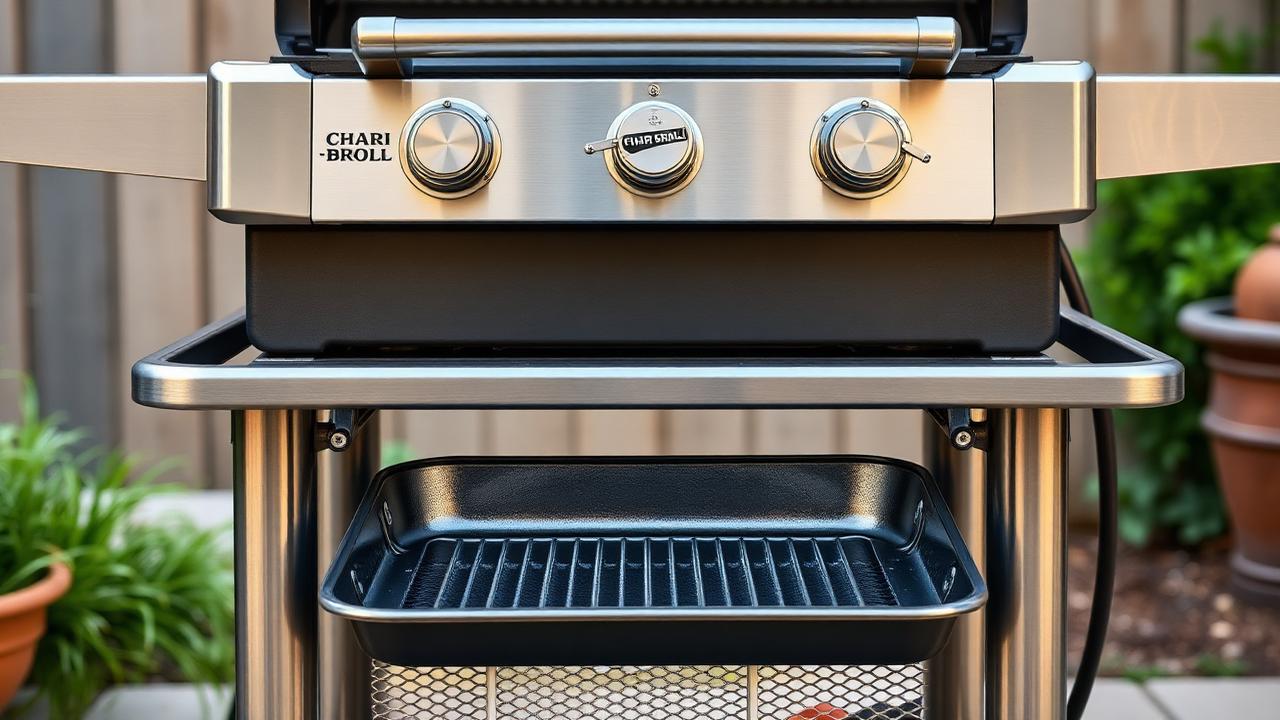
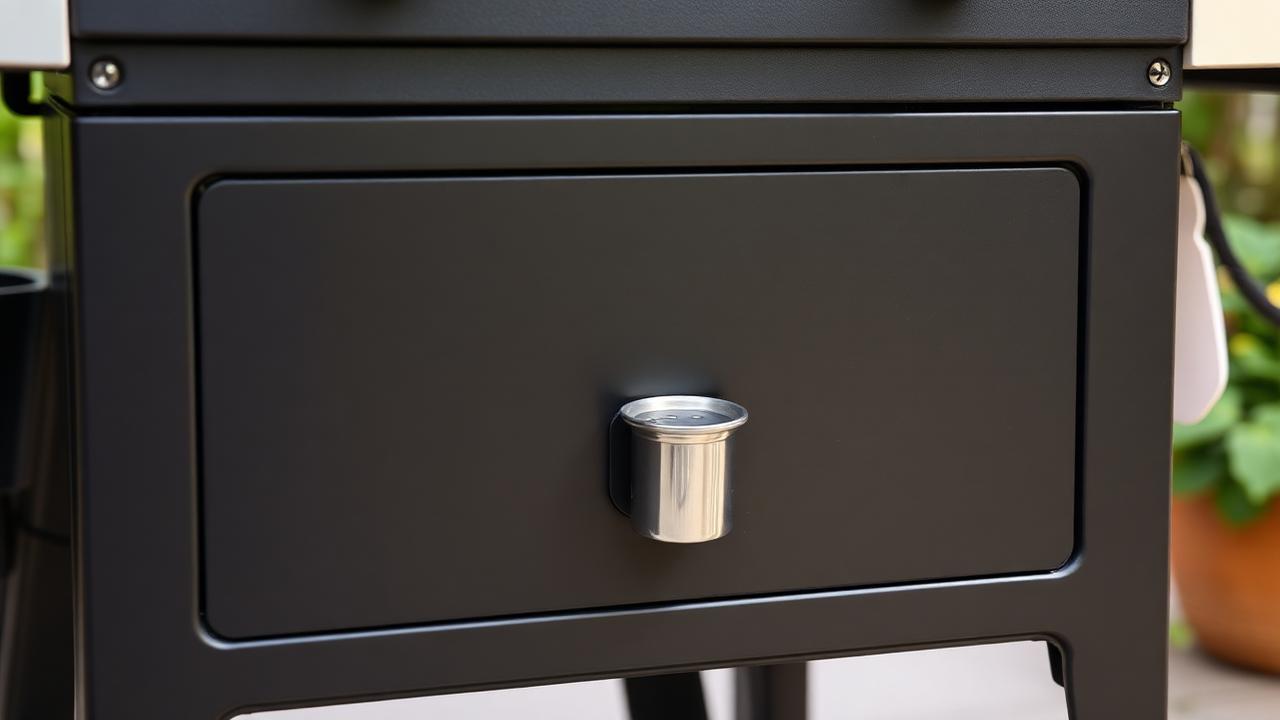
Most Char-Broil gas grills have a removable grease pan that slides out from the BOTTOM FRONT of the cart. TRU-Infrared models have a slightly different design — the grease catcher sits below the infrared emitter.
Different from any other grill. Blackstone griddles have an angled cooking surface that channels drippings to either a FRONT or REAR grease cup (depending on the model). The cup slides into a holder. Empty after every cook — Blackstone griddles produce more grease than any other grill type.
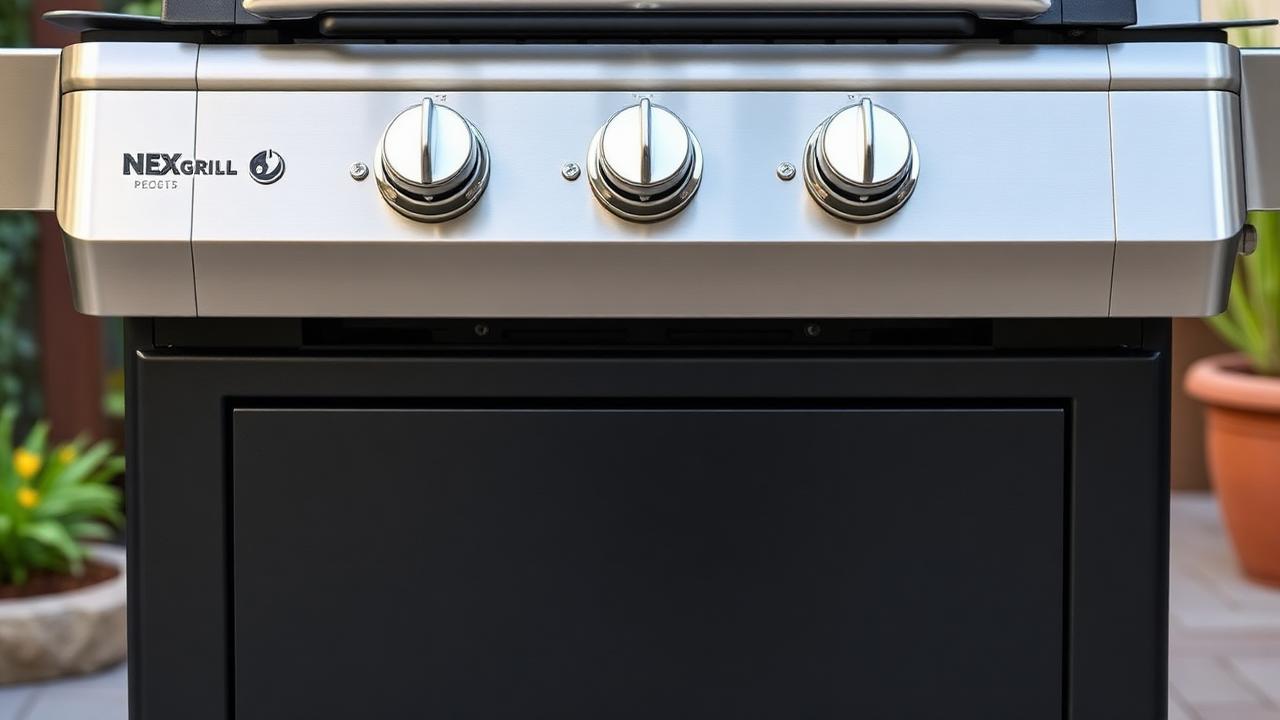
Most Nexgrill gas models have a removable grease cup at the bottom front. The cup is small (about 4 oz capacity) — empty after every cook.
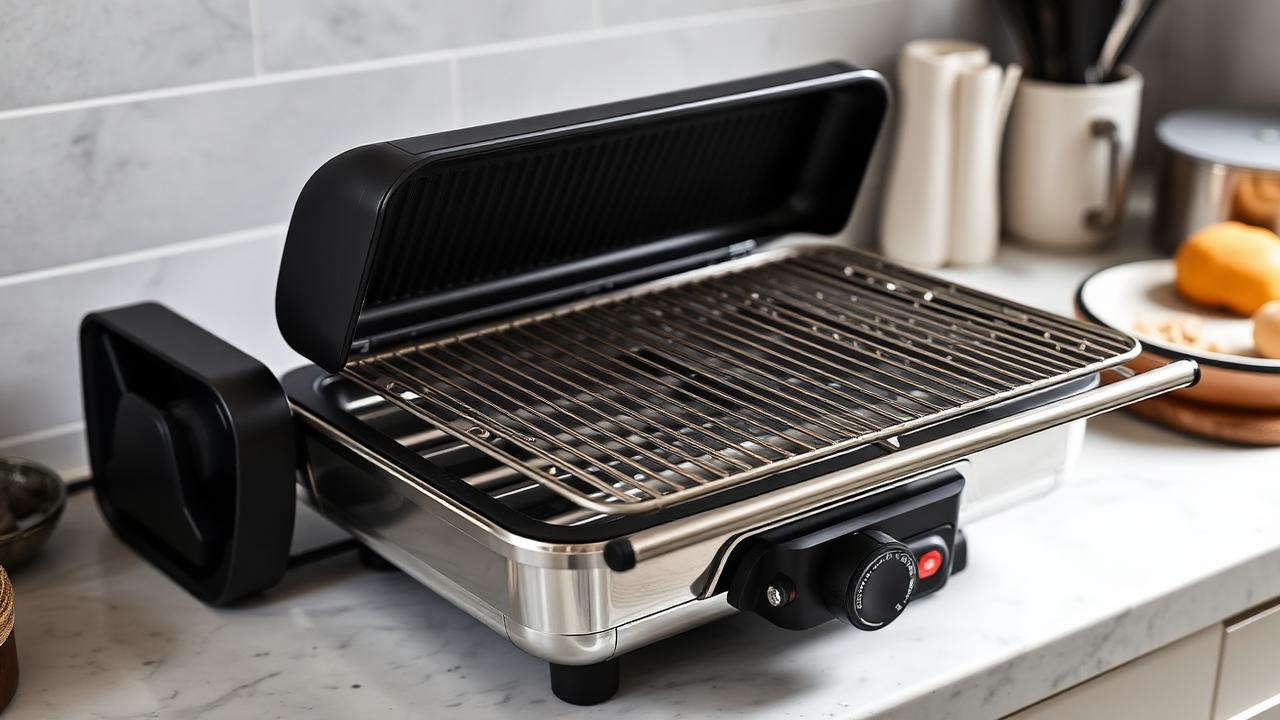
Indoor Ninja Foodi has a grease collection chamber inside the unit, accessed by removing the cooking grate and pulling out the splatter shield. Wash in the dishwasher between cooks.
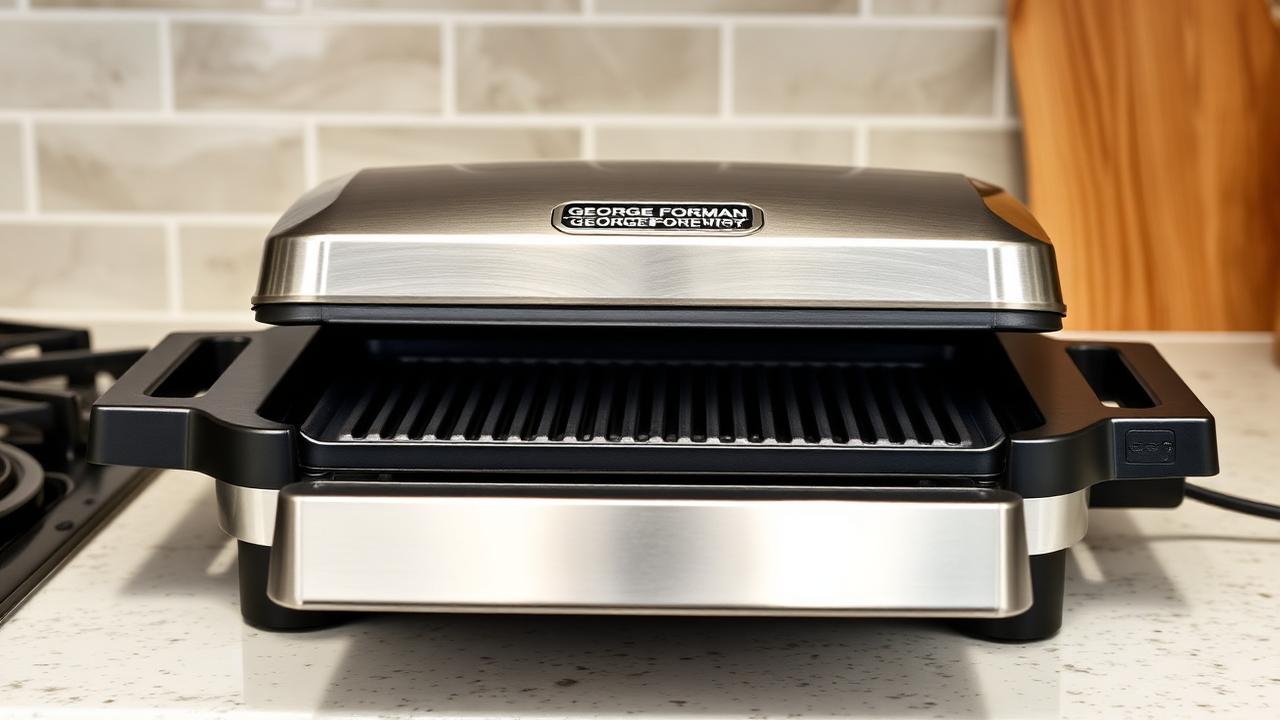
George Foreman: drip tray slides out from the front of the unit. Empty and wash after every cook — small reservoir. Expert Grill (Walmart house brand): grease cup mounted at the bottom rear, similar to Weber design. Replace the cup every 2-3 years — Expert Grill grease cups corrode faster than premium brands.
What to Use
Most grill cleaners on Amazon are mediocre. These four cover 95% of grill cleaning scenarios — and we've reviewed each individually.
TOP PICKAluminum foil liners that snap into the grease tray. The single best ROI grill accessory. Replace every 3-4 cooks instead of scrubbing.
 BEST VALUE
The strongest grill-specific degreaser on the market. Aerosol foam that clings to vertical surfaces.
 AFTERMARKET
Gentle enough for stainless steel, strong enough for moderate grease. The 'won't damage anything' choice.
 AFTERMARKET
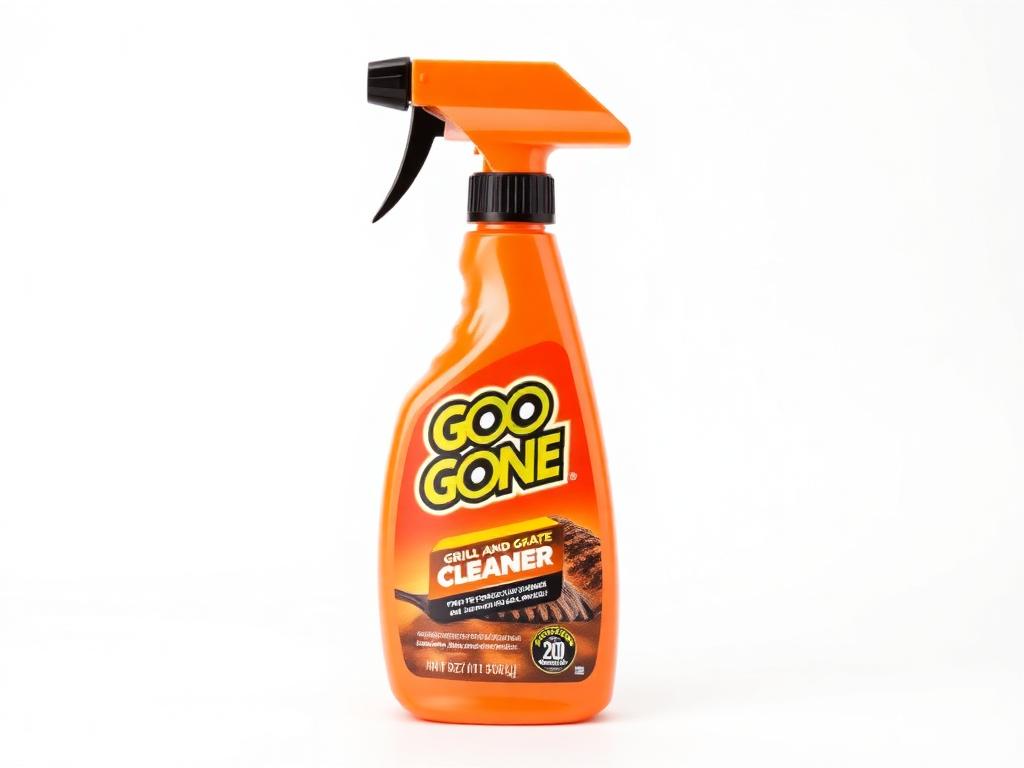
Specifically for cooking grates and flavorizer bars. Food-safe formula, no harsh residue.
Worth adding to the same order
Protects the deck or patio underneath. $30 spent here prevents $300 in deck restoration.
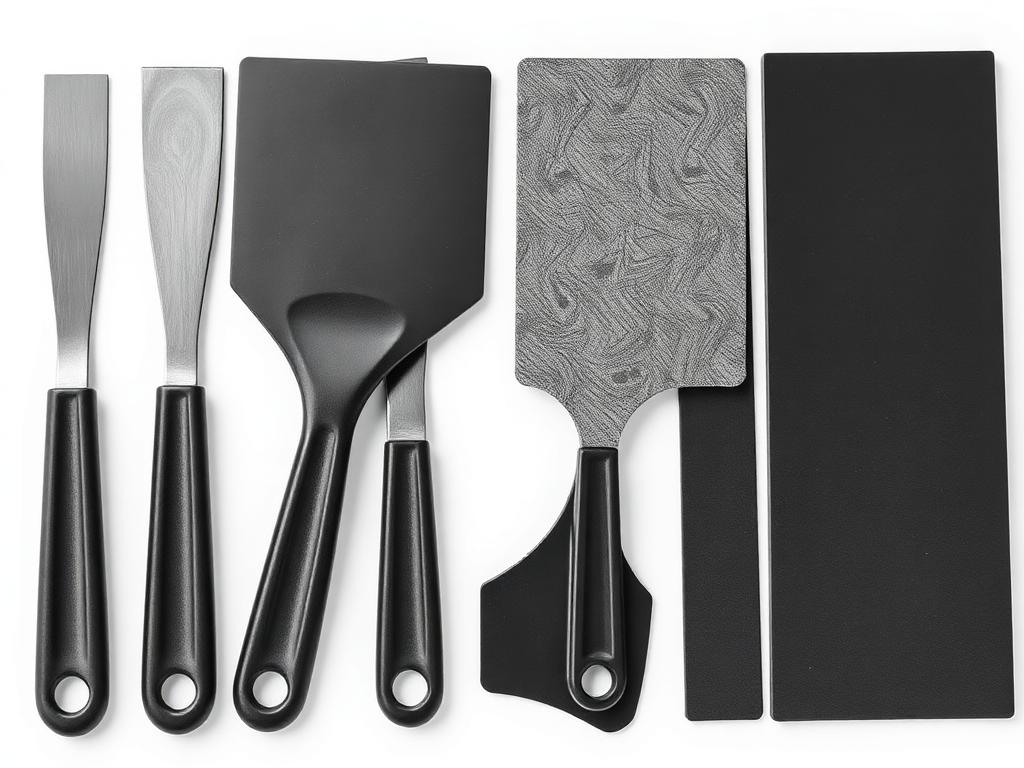
For grease tray scraping that won't damage the coating.
Frequency
Empty the grease cup/tray after every 2-3 cooks
For routine maintenance. 5-minute job. Prevents 90% of all grease-related grill problems.
Deep clean the grease tray every 5-10 cooks
Caked-on grease scrubbing. 20-30 minute job. Especially important after cooking high-fat foods (burgers, ribs, sausages).
Full cookbox cleanup every 25-30 cooks (or once per season)
Whole-grill cleaning. 1-hour job. The annual maintenance most people skip — until they shouldn't have.
Myth-busting
❌ Use oven cleaner (yellow can Easy-Off)
The lye in standard oven cleaner damages porcelain coatings, etches stainless, and removes painted finishes. Use grill-specific cleaners only.
❌ Rinse a hot grill with cold water
Thermal shock can warp the cookbox or crack porcelain components. Always let the grill cool fully first.
❌ Wash grease down the kitchen sink drain
Grease solidifies in pipes and causes clogs. Pour cooled grease into a sealed container in the trash, or recycle if your municipality accepts it.
❌ Burn off the grease at maximum heat
Partially works for SURFACE grease on the cooking grates, but doesn't address grease in the tray. And running max heat on a grease-laden tray is how grease fires start.
❌ Use a vacuum cleaner to suck up grease
Household vacuums aren't rated for grease and will be destroyed. Use a shop vac, or scrape and wipe.
Safety
FAQ
Empty the grease cup or tray after every 2-3 cooks. Deep-clean (soak and scrub) every 5-10 cooks. Do a full cookbox cleanup every 25-30 cooks or once per season. Heavy bacon, sausage, and burger sessions fill it faster — check before every cook and empty whenever buildup exceeds half an inch.
Let the grill cool fully, slide the grease tray out from underneath, empty solid debris and used grease into a sealed trash bag, scrape with a plastic scraper, wash with hot soapy water and degreaser, dry thoroughly, and install a disposable foil liner before reusing. The whole job takes about 10 minutes.
Traeger grills running newer D2 controllers display a 'Clean Grease Trap' reminder every 20-30 cooks. It's not an error — it's a scheduled maintenance prompt. The grill will still operate, but ignoring it eventually causes the HEr (high temp) error, grease fires, and warranty issues. Clean the trap, then dismiss the reminder via the Settings or Maintenance menu.
Two places. (1) Inside the grill, a slanted drip tray funnels grease through a side chute. (2) On the outside of the grill, a hanging grease bucket collects what comes out of the chute. Empty the bucket every 5-10 cooks and replace the drip tray foil liner monthly.
On Weber Spirit, Genesis, and Summit gas grills, a metal grease cup slides out from the rear bottom of the cabinet. The catch pan above it is shaped to funnel drippings into the cup. On older models, the entire bottom panel is the grease tray. Weber kettles have an ash catcher under the bowl, not a grease trap.
Most Char-Broil gas grills have a removable grease pan that slides out from the bottom front of the cart. TRU-Infrared models place the grease catcher below the infrared emitter — slightly different access but the same slide-out design.
Blackstone griddles channel grease across the angled cooking surface to either a front or rear grease cup (depending on the model). The cup slides into a holder on the outside of the griddle. Empty after every cook — griddles produce more grease than any other grill type.
Disconnect propane, let the grill cool, remove grates and flavorizer bars or heat plates, then scrape solid grease from the cookbox bottom with a putty knife. Vacuum loose debris with a shop vac (never a household vacuum), spray with degreaser, let sit 10 minutes, scrub, rinse or wipe down, and dry thoroughly. Run a 15-minute high-heat burn-off before cooking again.
Wait at least 2 hours for embers to die. Inspect for structural damage — warped lid, melted knobs, melted regulator hose, cracked porcelain. Replace damaged parts before reuse. Remove all components and scrub with degreaser. Pay attention to the underside of the lid where soot collects. Inspect the regulator hose for melted spots and replace if damaged. Have gas connections leak-tested before next use.
Easy-Off Heavy Duty BBQ Grill Cleaner is the strongest grill-specific degreaser — aerosol foam that clings to vertical surfaces. Simple Green is gentler and safe on stainless steel. Goo Gone Grill & Grate Cleaner is food-safe and ideal for cooking grates and flavorizer bars. Use the right one for the surface — heavy-duty degreasers can strip painted finishes.
Yes. Simple Green All-Purpose Cleaner is one of the safest degreasers for grills — gentle enough for stainless steel exteriors and porcelain coatings, strong enough for moderate grease buildup. Dilute per the label for routine use, or use full-strength on the grease tray. Rinse thoroughly and dry before next cook.
Only the BBQ-specific formulas like Easy-Off Heavy Duty BBQ Grill Cleaner. Standard oven cleaner (yellow can Easy-Off) contains lye that strips porcelain coatings, etches stainless, and removes painted finishes. The damage is permanent. Stick with grill-specific cleaners on grill surfaces.
Sprinkle cat litter, sawdust, or baking soda generously over the stain and let it sit overnight to absorb the grease. Sweep up the absorbent. Apply a concrete degreaser (Oil Eater or Krud Kutter Concrete Cleaner) or dish soap and hot water, scrub with a stiff brush, and rinse with a hose. Old or deep stains may require a baking-soda-and-degreaser poultice applied for 24 hours.
Use a stainless-specific cleaner like Bar Keepers Friend or Weiman Stainless Steel Cleaner. For baked-on grease, hit it with a degreaser like Simple Green first, then polish with the stainless cleaner. Always wipe in the direction of the grain (usually horizontal), never across it. Never use chlorine bleach (it pits stainless) or steel wool on visible exteriors (microscratches).
Brush grates while still warm after each cook with a stainless or bristle-free brush. For deep clean, remove grates and soak in hot water plus dish soap for 30 minutes, then scrub. For caked grease, spray with Goo Gone Grill & Grate Cleaner, let sit 10 minutes, then scrub. Cast iron grates need a different process — see our rusty grill grates guide.
Yes — chronically. Grease accelerates rust on cookbox bottoms and grease trays, corrodes burner tube ports from below, fuels flare-ups that warp flavorizer bars and grates, and is the #1 cause of grease fires that can damage gaskets, knobs, and regulators. A grill with a clean grease trap lasts roughly 50% longer than one that's never serviced.
Three causes. (1) Grease tray is overflowing — empty it. (2) Grease cup or tray isn't seated correctly — pull it out and reseat. (3) The cookbox or grease pan has rusted through, creating holes. Hold a flashlight underneath while pouring water through to find perforations. Rust-through means part replacement, not cleaning.
Yes — the single best ROI grill accessory. Disposable aluminum foil liners cost about $1 each, snap into the grease tray, and let you toss accumulated grease without scrubbing. Replace every 3-4 cooks. They cut grease tray cleaning time by roughly 80% and prevent rust on the metal tray underneath.
Let the grease cool and solidify. Scrape it into a sealed container (an empty coffee can or jar works) and put the container in the trash. Never pour grease down a sink or storm drain — it solidifies in pipes and causes clogs. Some municipalities accept used cooking grease for biodiesel recycling — check local rules.
No. A full grease tray is the #1 cause of grease fires. The grease has nowhere to go, so the next dripping ignites instead of getting collected. Empty before every cook. If you're mid-cook and notice the tray is full, finish what's already on the grill at low heat, then clean before next use.
Slide the cup out of its holder (front or rear depending on the model), pour solidified grease into a sealed trash container, scrape any caked residue with a plastic scraper, wash with hot soapy water and degreaser, dry thoroughly, and reinstall. Empty after every cook — Blackstone produces 2-3x the grease of a typical gas grill.
Eventually you'll have a grease fire — guaranteed, not hypothetical. Before that, you'll see persistent flare-ups even with lean cuts, smoke pouring from underneath the grill, smell of burnt grease during preheat, mold growth in warm wet weather, and accelerated rust on the tray and cookbox. Traeger grills will throw the HEr error. The fix is the same regardless: clean the trap.
Related Guides
Live Guide
Grease buildup is the #1 cause of flare-ups. Complete prevention and emergency-response guide.
Buying Guide
The top grill cleaners ranked — Easy-Off, Zep, Goo Gone, Giddy Up, Simple Green — head-to-head.
Live Guide
Five methods ranked by speed, including the overnight vinegar soak and cast-iron-safe approach.
Buying Guide
Covering your grill between cooks dramatically reduces grease buildup and cleaning frequency.
Four products cover every grease-cleaning scenario — disposable liners for daily maintenance, Easy-Off for heavy buildup, Simple Green for stainless surfaces, and Goo Gone for the cooking grates.